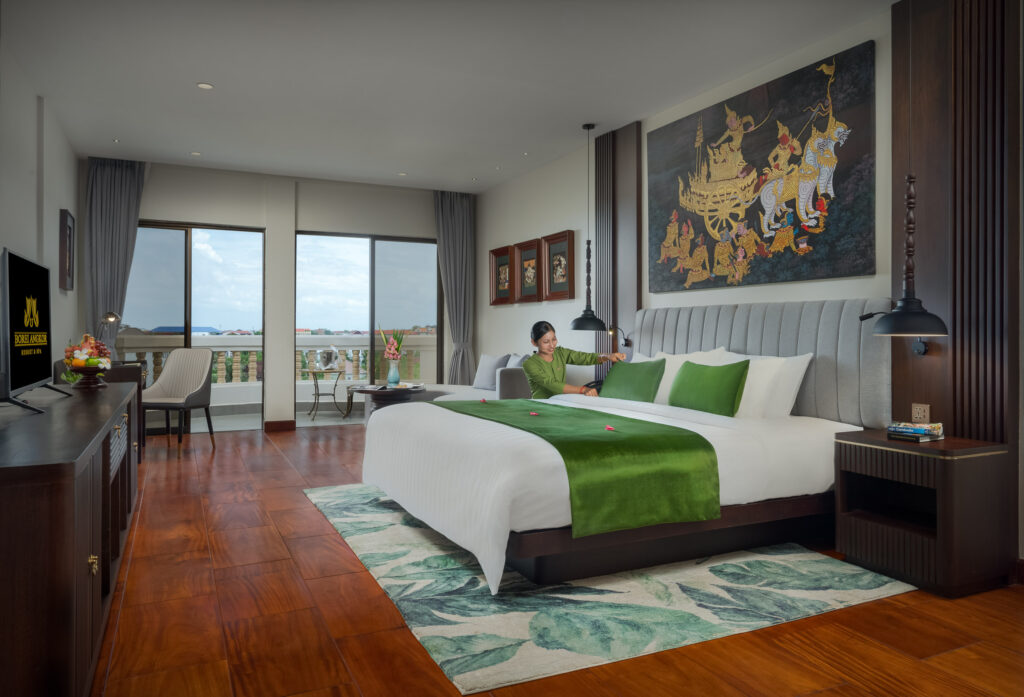
Professional hotel photography does not end when the camera is put down. A significant part of the work happens during post-production, where each image is carefully refined to ensure the property looks polished, natural, and consistent across websites, booking platforms, and marketing materials.
This page shows real before and after examples from hotel photography projects, giving an insight into the editing and retouching process behind the final images. From balancing multiple exposures and correcting lighting, to removing reflections, smoothing bedding, and refining small distractions, professional hotel photo editing is often one of the most time-consuming parts of the workflow.
The goal is never to create unrealistic images, but to present the property at its absolute best while maintaining a natural and believable look that reflects the real guest experience.
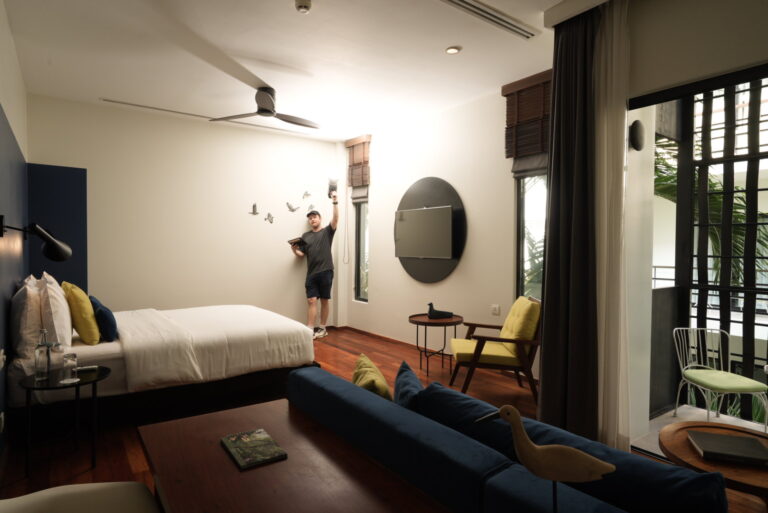
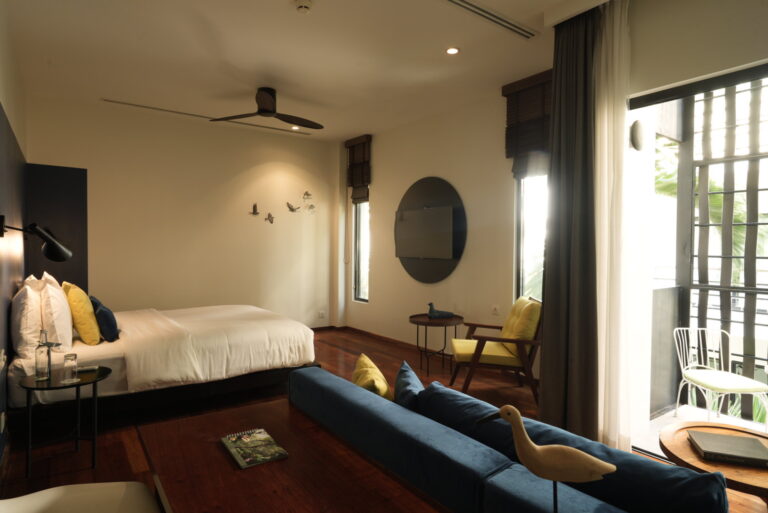
Example of pre and post production for an interior of a hotel room:
One of the biggest challenges in hotel photography is balancing the bright natural light coming through windows with the darker interior of the room. A single photograph straight out of camera rarely captures the space the way it feels in person. If exposed for the windows, the room can appear too dark. If exposed for the room, the windows often become completely blown out.
The images shown here are unedited “out of camera” frames captured during the shoot process. One frame uses additional artificial lighting (flash) to brighten key areas of the room, while another captures the natural ambient light and atmosphere of the space. During post-production, these exposures are blended together, often alongside many additional frames, to create a balanced final image.
This process allows detail to be retained both inside the room and outside the windows while also helping to reduce reflections, control highlights, smooth uneven lighting, and create a more natural and inviting appearance. The goal is not to make the room look artificial, but to present the space in a way that feels bright, welcoming, and true to the guest experience.
This process becomes especially important in rooms with strong natural light, exterior views, glossy surfaces, mirrors, glass, polished floors, or darker interior spaces. These environments can be extremely difficult to photograph accurately in a single exposure.
A professionally photographed hotel gallery should also feel visually consistent from room to room. Maintaining a consistent brightness, colour balance, and overall atmosphere across an entire property creates a more premium presentation on OTAs, hotel websites, and marketing materials.
Consistent, well-balanced photography helps rooms feel more trustworthy, spacious, and inviting to potential guests, particularly when viewed quickly on booking platforms where first impressions are critical.
See my thoughts on how hotel photography can increase bookings
A large part of professional hotel photo editing involves refining small details that can distract from the room itself. This can include smoothing bedding and fabrics, removing dust spots, cleaning marks from walls or floors, reducing distractions, correcting small imperfections, and ensuring furniture and decor look neat and consistent throughout the image.
These adjustments are usually subtle, but they play a major role in creating polished hotel photography that feels professional and high-end without appearing artificial.
Extreme example of pre and post production for a hotel exterior:
Good hotel photography starts long before post-production begins. Preparing rooms properly before the shoot can dramatically reduce editing time and help create more polished, natural-looking images from the start. Read my guide on how to prepare for a hotel photoshoot, including room preparation tips, styling considerations, and ways to help the photography process run more smoothly and efficiently: